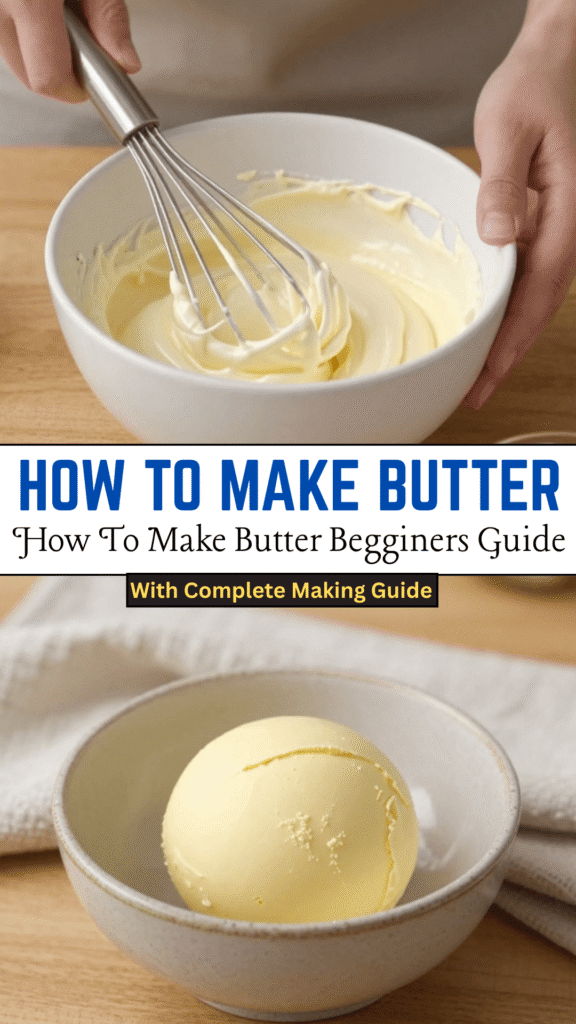
How To Make Sourdough Starter? Step By Step Guide
I’ve been baking sourdough bread for nearly fifteen years now, and let me tell you, making your own starter is one of the most rewarding things you can do in your kitchen. That first moment when you see your starter bubbling with life is pure magic.
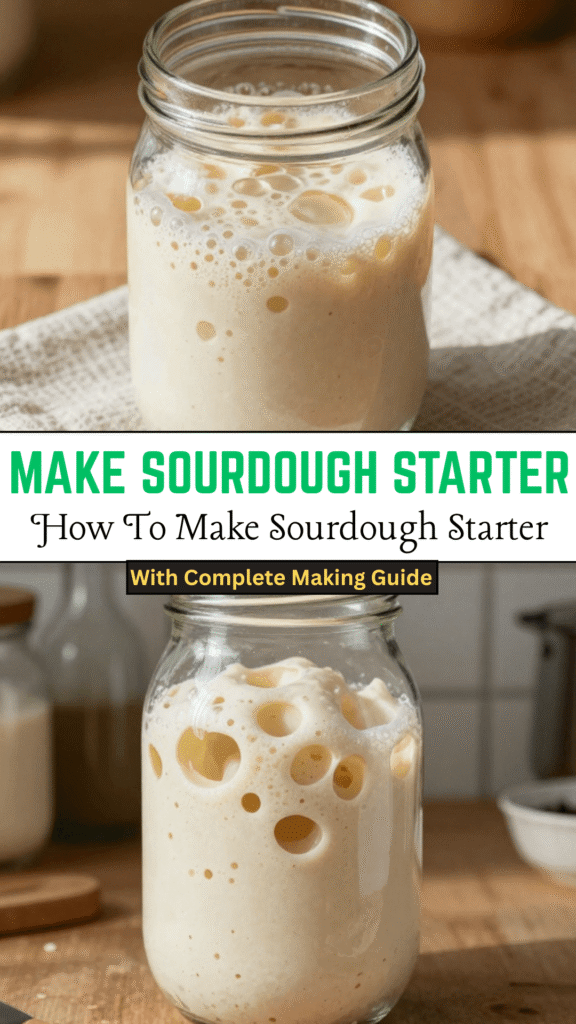
I remember standing in my kitchen, looking at my jar of bubbling flour and water mixture, feeling like I’d discovered something incredible. And you know what? You can experience that same feeling too. Making sourdough starter is easier than you think, and I’m here to walk you through every step.
Quick Glance: Sourdough Starter Methods at a Glance
Here’s a quick table to help you understand the different methods I’ll be covering:
| Method | Time | Difficulty | Best For |
|---|---|---|---|
| Basic Starter | 5-7 days | Easy | Beginners |
| Easy Quick Method | 3-5 days | Very Easy | Impatient bakers |
| Stronger Starter | 7-10 days | Moderate | Better rise |
| More Sour Flavor | Extended | Moderate | Tangy bread |
| Less Sour Flavor | 5-7 days | Easy | Mild taste |
| No Discard Method | Varies | Moderate | Zero waste |
| Active Starter | Daily feeds | Moderate | Ready to bake |
| Day by Day Process | 7 days | Easy | Complete guide |
| Beginner Guide | 7 days | Easy | New bakers |
| With Commercial Yeast | 3 days | Easy | Backup option |
How to Make Sourdough Starter: The Basic Method
When I first started making sourdough, I followed this basic method, and honestly, it’s still my go-to approach. This is the foundation everything else builds on.
Ingredients
- 100 grams of room temperature water
- 100 grams of flour (I use 75 grams all-purpose and 25 grams whole wheat)
- A clean jar
- Cheesecloth or kitchen towel
- A kitchen scale
How to Make
- Place your bowl or jar on your scale and make sure it’s set to zero grams
- Add 100 grams of room temperature water to your jar
- Add 100 grams of your flour mixture
- Mix together with a fork until a thick paste forms (this is your starter’s birth moment)
- Cover the jar loosely with cheesecloth or a kitchen towel
- Place it in a warm spot and let it sit for 24 hours
- After 24 hours, you might see some bubbles forming, which is a great sign
Easy Way to Make Sourdough Starter
Looking for the quickest path? I’ve found that if you want to speed things up while keeping everything simple, this is your method. I actually use this when I’m in a hurry or when I want to restart a new jar.
Ingredients
- 60 grams of warm water (around 85 degrees Fahrenheit)
- 60 grams of your chosen flour
- A large clear jar
- A fork or spoon
How to Make
- Combine 60 grams of flour and 60 grams of warm water in your clear jar
- Mix everything together with a fork until smooth
- The texture should look like thick pancake batter
- Scrape down the sides of the jar with a spatula
- Cover and let it rest in a warm spot (75-80 degrees Fahrenheit) for 24 hours
- Note the exact time you started this so you can keep to a schedule
This method gives you results just as good as the bigger batch, but uses less flour. I love using a clear jar because you can see all the action happening inside.
How to Make Stronger Sourdough Starter
After making starter for years, I realized that sometimes you need one with more strength and rising power. A stronger starter means better bread rise and better flavor development.
Ingredients
- 75 grams of your existing starter
- 50 grams of rye flour
- 50 grams of all-purpose flour
- 115 grams of water (warm, around 80 degrees Fahrenheit)
- A clean jar
How to Make
- Place a clean jar on your scale and tare it to zero
- Scoop 75 grams of your existing starter into the jar
- Add 50 grams of rye flour (this adds strength and flavor)
- Add 50 grams of all-purpose flour
- Pour in 115 grams of warm water
- Mix everything together until no dry bits remain
- Cover loosely and let it rest in a warm spot for 24 hours
- Feed your starter this way daily for about three to five days
The rye flour really does make a difference. I noticed my starter became noticeably more active after switching to this method.
How to Make Sourdough Starter More Sour
Want that tangy, sour taste in your bread? I do. Here’s what I’ve learned about getting that mouth-puckering flavor you love.
Ingredients
- Your existing active starter
- All-purpose flour or whole wheat flour
- Water
- Time and patience
How to Make
- Keep your starter at room temperature instead of the fridge (cold slows fermentation)
- Feed your starter once daily instead of twice, which gives it longer to develop
- Let it ferment longer between feedings, around 24-48 hours
- Use warmer water during feedings to speed up fermentation
- Add a small amount of whole grain flour to your feeds (whole wheat or rye)
- Increase the time between feedings to develop more acid
- Let your dough ferment longer before baking (bulk fermentation of 8-12 hours)
I’ve found that the longer fermentation times really do create that sourdough tang that makes people ask, “What’s your secret?”
How to Make Sourdough Starter Less Sour
Not everyone wants super sour bread, and that’s totally okay. If you prefer milder flavors, here’s what works for me.
Ingredients
- Your existing starter
- All-purpose flour
- Room temperature water
- A regular feeding schedule
How to Make
- Feed your starter twice daily instead of once
- Keep feedings regular, around 12 hours apart
- Use room temperature water, not warm water
- Refrigerate your starter between uses to slow fermentation
- Keep your starter at cooler temperatures around 70 degrees Fahrenheit
- Use only all-purpose flour, skip whole grain flours
- Use shorter fermentation times for your dough
- Bake sooner rather than later after your final rise
The key here is speed and more frequent feeding. Less time for acids to develop means milder flavor.
How to Make Sourdough Starter No Discard
I’ll be honest with you: I used to feel guilty throwing away starter every single day. Then I learned there are ways to reduce waste. This method really changed my approach.
Ingredients
- Your active starter
- Flour and water in smaller amounts
- A scale for accurate measurements
How to Make
- Feed your starter in smaller amounts that you’ll actually use
- When you use starter for baking, calculate exactly how much you need
- Feed what’s left over with just enough flour and water for your next bake
- Make sourdough pancakes, crackers, or muffins with extra starter
- Create discard recipes you actually want to eat
- Keep your starter amount small, around 50 grams, if you bake less frequently
- Share extra starter with friends who want to start baking
This approach made me feel so much better about the whole process. Nothing goes to waste, and your friends get fresh starter.
How to Make Active Sourdough Starter
An active starter is one that’s ready to bake with right away. I always keep mine active because I bake frequently.
Ingredients
- Fed and bubbly starter
- Flour
- Water
- A consistent feeding schedule
How to Make
- Feed your starter in the morning and evening, every 12 hours
- Use this ratio: 1 part starter to 1 part flour to 1 part water by weight
- After feeding, let it rest at room temperature for 4-6 hours
- Check that it has doubled in size and shows lots of bubbles
- Once it passes the “poke test” (a bubble doesn’t collapse when poked), it’s ready
- Maintain this schedule for three to five days to get it really active
- Your starter should smell pleasant and yeasty when it’s truly active
When my starter is active, it literally smells like a bakery in my kitchen. That’s how you know it’s ready to work magic.
How to Make Sourdough Starter Day by Day
Let me walk you through what happens each day. This is the real timeline, not rushed or fancy.
Day One
Mix 100 grams of whole flour and 125 grams of warm water in a clean jar. Stir well and cover loosely. Keep it somewhere warm for 24 hours.
Day Two
You might see nothing yet, and that’s fine. Scoop out 75 grams of your mixture and discard the rest. Add 50 grams of flour and 115 grams of water. Mix well and cover. Wait another 24 hours.
Day Three
Again, take 75 grams of the mixture, discard the rest, and feed with 50 grams flour and 115 grams water. Cover and wait.
Day Four
Same routine. Keep doing this consistently. By now you might start seeing some activity.
Day Five and Six
Continue the same feeding pattern twice a day if you want faster development, or once daily as I’ve described.
Day Seven and Beyond
Now the fun part starts. You should see real bubbling activity. Reduce your feeding to just 20 grams of starter, then add 30 grams rye flour, 70 grams all-purpose flour, and 100 grams water. Do this twice daily.
I always find day seven is when things really get exciting. That’s when beginners start believing they actually made something alive.
How to Make Sourdough Starter: Beginners Guide
If you’re brand new to this, here’s my simplified beginner approach. I wish someone had explained it this clearly to me fifteen years ago.
Ingredients
- 60 grams flour (all-purpose is perfect)
- 60 grams warm water
- A jar
- A spoon
How to Make
- Put 60 grams of flour in a jar
- Add 60 grams of warm water (warm like a baby’s bathwater)
- Stir it together until everything is mixed
- Cover it with something loose, like a towel or cheesecloth
- Leave it on your counter at room temperature for 24 hours
- The next day, take out half of what’s in the jar (throw it away)
- Add another 60 grams of flour and 60 grams of water
- Stir and cover again
- Keep doing this every day for five to seven days
- By day five or six, you’ll see it bubbling like crazy
- Keep feeding it daily or twice daily until it’s super active
- Once it doubles in size within 4-6 hours of feeding, it’s ready to use
That’s it. Really. Five ingredients max, one simple step repeated. You’ve got this.
How to Make Sourdough Starter with Yeast: A Backup Method
Here’s something not everyone talks about: you can actually jump start a starter with a tiny bit of commercial yeast if you want results faster. I keep this method in my back pocket.
Ingredients
- 100 grams flour
- 100 grams warm water
- A pinch of instant yeast (really just a small pinch)
- A jar and spoon
How to Make
- Mix your flour and water together as usual
- Add just a tiny pinch of instant yeast (less than 1/8 teaspoon)
- Stir everything well
- Cover and let it rest
- Feed it the next day just like a regular starter
- Continue daily feedings for five to seven days
- The yeast gives it a quick start, then wild yeast takes over
- After five days, your wild cultures will have taken charge
I’ve used this when I wanted to get going quickly, and honestly, it works great. The difference between this and a pure wild starter disappears after about a week.
Frequently Asked Questions
How long does it really take to make a sourdough starter?
In my experience, you can have an active starter in five to seven days using standard methods. Some take up to two weeks. Temperature matters a lot here.
What if my starter smells bad?
Bad smell is usually normal during the first few days. You’re looking for a yeasty, slightly sour smell. If it smells like nail polish or truly rotten, something’s wrong.
Can I make starter in a cold kitchen?
Yes, but it’ll take longer. I’ve found that keeping water around 80 degrees and the jar in a warm spot (like above the fridge) helps a lot.
Do I really have to feed it every day?
While it’s developing, yes. Once it’s established, you can refrigerate it and feed weekly.
What kind of flour works best?
All-purpose works great. Whole wheat and rye add strength and faster development. I mix mine.
Can I use bottled water?
Absolutely. I use filtered water because my tap water is pretty hard, but bottled or tap both work fine.
Conclusion
Making sourdough starter changed my whole relationship with baking. After fifteen years, I can tell you that there’s no feeling quite like having a jar of living culture that you created yourself. Sure, it takes a week or so, but that’s literally just you doing almost nothing and nature doing all the work.
Pick a method that sounds right to you, stick to a schedule, and trust the process. Your starter will let you know when it’s ready. Once you’ve got one going, you’ve opened the door to some of the best bread you’ll ever taste. I still remember the first loaf I made with my starter, and I get excited every single time I bake now.
You’ve got this. Your starter is waiting to happen.