How To Make Butter At Home
Let me tell you something I learned over fifty years of cooking: making butter at home is one of the easiest and most satisfying things you can do in your kitchen. When I first tried making butter, I expected it to be complicated and messy. I was wrong! It’s actually dead simple, and honestly, it’s become something I do regularly because the taste is just so much better than store-bought.
I remember the first time I churned butter with my kids. Their faces lit up when they realized that cream could transform into actual butter right before their eyes. That moment hooked me, and now it’s become a family tradition that we do together. The best part? You probably already have everything you need to get started.
Making butter at home takes just a few minutes with the right equipment, or about fifteen to twenty minutes if you go the old-school route. Either way, you’ll end up with fresh, delicious butter that tastes completely different from what you buy in the grocery store. Plus, you’ll know exactly what’s in it because you made it yourself.
Quick Glance: Different Methods for Making Butter
| Method | Time Required | Best For | Difficulty |
|---|---|---|---|
| Stand Mixer Method | 4-5 minutes | Quick results | Very Easy |
| Blender Method | 5-10 minutes | Fast and simple | Very Easy |
| Mason Jar Shaking | 15-20 minutes | Beginners | Easy |
| Hand Mixer | 8-10 minutes | Good control | Easy |
| Food Processor | 5-8 minutes | Medium batches | Easy |
| Traditional Churn | 20-30 minutes | Old-fashioned style | Moderate |
| Raw Milk Method | 10-15 minutes | Rich flavor | Easy |
| Blender Plus Method | 6-8 minutes | Extra creamy | Very Easy |
How To Make Butter: The Basic Method
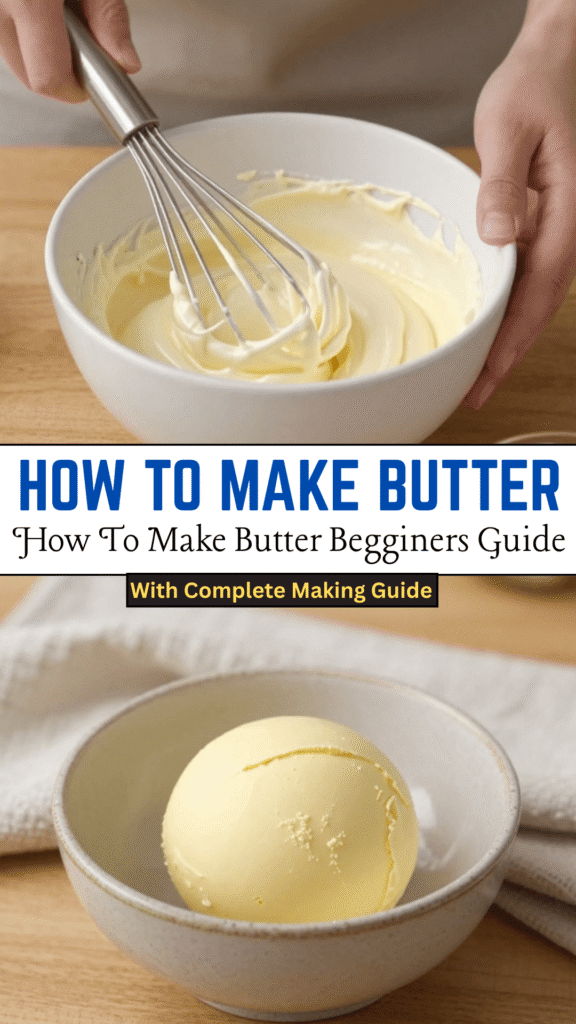
Making butter is really just about separating the fat from the liquid in cream. That’s the whole concept. You take heavy cream and agitate it until the fat solids clump together, leaving the buttermilk behind. Once you understand that, everything else makes sense.
I usually start with the simplest approach because I’m lazy and like quick results. All you need is heavy whipping cream and something to shake or blend it. The magic happens when you push past the whipped cream stage and keep going until everything separates into two distinct parts: solid butter and liquid buttermilk.
Ingredients
- 1 pint heavy whipping cream
- Cold water for rinsing
- Salt (optional)
How to Make
- Pour your heavy cream into your chosen container or mixer
- Begin agitating at medium speed or shake vigorously by hand
- Watch as the cream thickens into whipped cream after about 2 minutes
- Keep going past the whipped cream stage
- Around 4 to 5 minutes, you’ll see the mixture start separating into yellow solids and white liquid
- Stop when you have clear separation
- Drain off the buttermilk
- Rinse the butter with cold water while squeezing out extra liquid
- Add salt if you like and work it through
- Pat dry and store in the fridge
How To Make Butter Using A Blender
The blender method became my favorite because it’s seriously quick and requires zero skill. I discovered this years ago when my stand mixer was in the shop, and I never went back. The blender is fast, efficient, and makes beautiful creamy butter.
The key with a blender is making sure you use high speed and watch carefully. You’ll go from whipped cream to separated butter faster than you’d expect. Some blenders do this job in under five minutes. I’ve made butter this way hundreds of times with consistent results every single time.
One thing I love about the blender method is that the butter comes out a little creamier and softer because it retains a bit more of the buttermilk. Some people say that’s not ideal, but I think it spreads easier and tastes absolutely wonderful.
Ingredients
- 1 pint heavy whipping cream
- Cold water for rinsing
- Salt (optional)
How to Make
- Pour cream into your blender until it’s about half full
- Cover the blender to prevent splashing
- Turn it on high speed
- Listen and watch the mixture
- After about 4 to 6 minutes, you’ll hear splattering and see separation happening
- Stop the blender and check your progress
- If it looks separated with clear butter and buttermilk, you’re done
- If it’s still creamy, blend a bit longer
- Strain through a fine mesh strainer to separate the buttermilk
- Rinse with cold water and squeeze out remaining liquid
- Add salt if desired and refrigerate
How To Make Butter At Home: A Beginner’s Guide
If you’ve never made butter before, I want to take away any worry you might have. This is genuinely beginner-friendly. I’ve taught children as young as six how to do this, and they get it right away.
The most important thing to understand is that you’re not doing anything magical here. You’re just agitating cream until the fat molecules clump together. That’s it. Every single method works on this same principle, just with different tools.
When I first started, I used a mason jar and my own two hands. It took longer, maybe twenty minutes, but it actually worked great. The cream got warmer from the shaking, which helped things move along faster. Plus, there’s something really rewarding about making butter using just your own effort.
Ingredients
- 1 pint heavy cream at room temperature
- Mason jar with tight lid or your chosen mixer
- Cold water
- Salt (if desired)
How to Make
- Pour cream into your mason jar, filling only halfway
- Screw the lid on tight
- Shake vigorously for about 10 to 15 minutes
- You’ll feel the cream thicken and eventually feel a solid bump inside
- When you see clear separation, stop shaking
- Pour off the buttermilk
- Rinse the butter with cold water using your fingers
- Squeeze and knead the butter to remove all liquid
- Keep rinsing until the water runs clear
- Add salt and enjoy
How To Make Butter From Raw Milk
Raw milk butter is a totally different animal. The flavor is richer, more complex, and honestly just tastes like what butter should taste like. I started making it this way after I found a local farm that sells raw milk, and I haven’t looked back.
The process is basically the same, but the raw milk adds a depth of flavor that pasteurized cream just can’t match. The fat content is also usually higher in raw milk cream, which means you get more butter from less liquid. It’s a win-win situation.
One thing to note: raw milk cream takes a little longer to separate, but not by much. Maybe an extra minute or two. The wait is worth it for the incredible taste you get.
Ingredients
- 1 quart fresh raw milk (let sit for cream to separate to top)
- Skim off cream from the top
- Cold water for rinsing
- Salt (optional)
How to Make
- Let raw milk sit in the fridge for a few hours until cream rises
- Skim the cream off the top
- Let cream come to room temperature
- Pour into your mixer or jar
- Begin agitating at medium speed
- Continue for about 5 to 7 minutes until separated
- Drain buttermilk
- Rinse with cold water multiple times
- Squeeze out all excess liquid
- Add salt if desired and store in the fridge
How To Make Organic Butter
Going the organic route just means you’re starting with organic cream from organic milk. The process doesn’t change at all, but the final product is cleaner and free from pesticides and synthetic chemicals.
I switched to organic about ten years ago, and I could honestly taste the difference. The butter tastes creamier and richer. Plus, knowing that the cows were treated well and fed organic grain makes me feel better about what I’m eating. It’s a small price difference for something that matters.
Ingredients
- 1 pint organic heavy cream
- Cold water
- Sea salt (optional)
How to Make
- Pour organic cream into your mixer
- Beat at medium speed
- Increase speed to medium-high after one minute
- Continue beating for 4 to 5 minutes
- Watch for separation to begin
- Stop when completely separated into butter and buttermilk
- Strain through cheesecloth or fine strainer
- Rinse with ice water while pressing with a spatula
- Squeeze and knead until all liquid is gone
- Season with sea salt if you like
The Easiest Way To Make Butter
If you want the absolute easiest method, use a stand mixer. This is my go-to when I’m making butter and have places to be. It’s fast, hands-off, and reliable.
I literally just pour cream in, flip the switch, and wait. Four or five minutes later, I have fresh butter. The stand mixer does all the work while I pour a cup of coffee or do something else. It’s incredible how easy it is.
One warning though: cover your mixer with a dish towel when it starts separating, or you’ll get buttermilk splashed everywhere. I learned this the hard way, and my kitchen ceiling has never been the same.
Ingredients
- 1 pint heavy whipping cream
- Cold water
- Salt (optional)
How to Make
- Pour cream into stand mixer bowl
- Attach the flat beater (not the whisk)
- Start on medium speed for one minute
- Increase to medium-high speed
- Drape a dish towel over the mixer
- Continue mixing for 4 to 5 minutes
- Stop when separation is complete
- Pour off buttermilk
- Rinse butter with cold water several times
- Season with salt if desired
How To Make Old-Fashioned Style Butter
This method takes me back to simpler times. Old-fashioned butter making is done by hand with a traditional churn or a mason jar. It’s slower, but there’s something beautiful about doing it the way our grandmothers did.
I make butter this way at least once a month just for the experience. Sure, I have all the modern equipment, but there’s something satisfying about the work involved. Plus, the kids absolutely love it. It becomes a family activity rather than just another kitchen task.
The hand-shaken butter comes out a little softer because it retains more buttermilk, which honestly makes it spread better on warm bread straight from the oven.
Ingredients
- 1 pint heavy cream in a mason jar
- Cold water
- Salt (optional)
How to Make
- Fill mason jar halfway with heavy cream
- Screw lid on tight
- Shake vigorously for 8 to 10 minutes
- Take breaks if your arms get tired
- You’ll feel the transformation happen inside the jar
- When you hear clear sloshing with something solid hitting the sides, keep going a bit more
- When fully separated, pour into a strainer
- Let liquid drain out
- Rinse the butter in cold water
- Knead with your hands until water runs clear
- Add salt and serve
How To Make Butter With Just 1 Ingredient
Yes, you really can make butter with just one ingredient. That ingredient is heavy cream. Water is free, so technically the only thing you’re buying is the cream.
This was mind-blowing to me when I first realized it. No milk, no salt, no special ingredients. Just cream. The simplicity of it is beautiful. Everything else you add is optional and is really just a matter of preference.
Ingredients
- Heavy whipping cream (that’s all)
How to Make
- Pour heavy cream into any mixer or container
- Agitate using your method of choice
- Continue until separation occurs
- Drain off the buttermilk
- Rinse with water if you want
- You have butter
- Add salt if you prefer salted butter
- If you rinse, pat dry first
- Refrigerate
- Use within two weeks for best quality
How To Make and Store Homemade Butter
Making butter is one thing. Keeping it fresh and delicious is another. I’ve learned a lot about storage over the years, and I want to share what works best.
Fresh butter stays good in the fridge for about two weeks. That’s usually not a problem because I use mine faster than that. I store mine in a covered container on the coldest shelf of my fridge, usually in the back where it stays coldest.
Freezing butter is also great if you make a big batch. I freeze mine in ice cube trays and then pop them into freezer bags. That way, I have perfect portions ready to go whenever I need them. Frozen butter stays good for months.
Storage Tips
- Keep butter in a covered container
- Store on the coldest shelf of your fridge
- Keep away from strong-smelling foods
- Wrap well before freezing if you want to freeze it
- Frozen butter lasts about 6 months
- Let frozen butter thaw in the fridge before using
- Fresh butter tastes best within 2 weeks
- Always use clean utensils when taking butter out
- Don’t leave butter out on the counter too long
- Label frozen butter with the date
Frequently Asked Questions
How much cream do I need to make butter?
I usually start with one pint because it makes a nice amount without being too much. You need at least 16 ounces to get a good separation though.
Why isn’t my butter separating?
The most common reason is that your cream is too cold. Let it sit on the counter for thirty minutes to reach room temperature. Cold cream takes much longer to separate.
Can I make butter from regular milk?
No, you need cream with high fat content. Regular milk doesn’t have enough fat to make proper butter.
Should I rinse my butter?
Yes, I always rinse mine with cold water to remove the buttermilk. This helps it last longer and taste cleaner.
Can I use the buttermilk I drain off?
Sure, but remember it’s fresh buttermilk, not cultured like store-bought. Use it in baking or cooking, but don’t substitute it one-to-one in recipes that call for cultured buttermilk.
How long does homemade butter last?
About two weeks in the fridge or six months in the freezer.
Do I need to add salt?
No, it’s completely optional. I like mine salted, but plenty of people prefer unsalted.
Conclusion
After fifty years in the kitchen, I can honestly say that making butter at home is one of my favorite simple pleasures. There’s nothing complicated about it, and the results taste so much better than store-bought. Whether you use a stand mixer, blender, or your own two hands, you’re going to end up with amazing fresh butter that you made yourself.
I encourage you to try it this week. Pick a method that sounds easiest for you and give it a shot. You’re going to be amazed at how simple it is and how good it tastes. Once you’ve made your own butter, you might never go back to buying it.